Saturday 28 April 2018

Making a Weighted Blanket

In case you haven't heard about them, Weighted Blankets are taking the (sensory) world by storm.

They are a type of quilt which has some kind of material sandwiched between the layers to give weight.  The idea behind this is that many people (often on the Autism Spectrum, but not only!) find it calming to have something like this either on their lap or over their whole body.

The weights can be from a number of materials, but a common option is the use of Poly Pellets, the same as those used for stuffing toys, especially Beanie Toys.

A dear friend of mine has been researching these as options for her child, but they are quite expensive.

So I volunteered to make one for her.

Sharing what we did in case it's useful for anyone else.

In all honesty, weighted blankets are worth what you pay for them.  The materials are not overly expensive, however, there is a LOT of work involved in making them.  It probably took us a total of 2 days to complete ours, with lots of help.  It could have been done a little bit quicker, but not much.

In addition to the work involved, the shipping of something heavy is expensive!  For our person, we calculated that we needed 5kg of beads.  They weren't particularly expensive, but the shipping cost more than the beads.
The Poly Pellets - everyone liked playing with them!

If you are someone who is handy with a sewing machine and likes problem solving, then this is what we did.

I browsed a few tutorials online, and found this one to be the most helpful - Mama Smiles Tutorial

I liked that there were explanations for how she approached it, and she has also incorporated suggestions from others who've made a blanket.

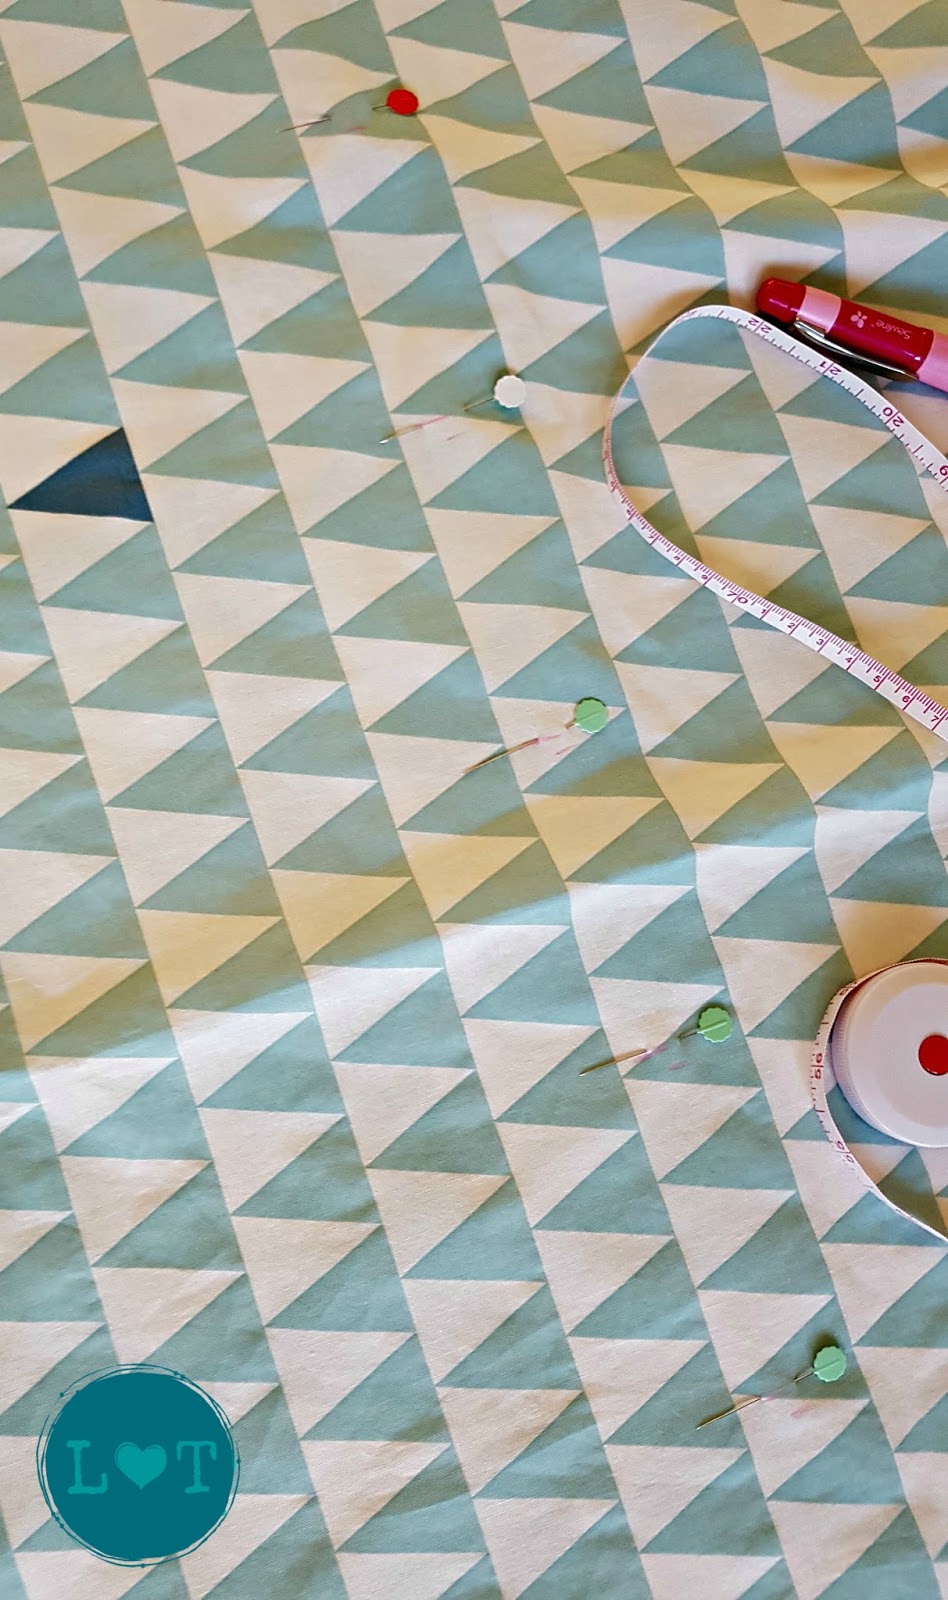
We bought a quilt cover from Ikea, because that saved us measuring and cutting (if you recall, I'm not so good at the straight line thing....).  This was the one we chose - I just love the fabric.  It nearly didn't make it to its intended owner ;)

Edit:  we chose this because it's 100% cotton, and from experience we like how the Ikea fabrics wash and wear.  It's worth checking what your recipient prefers, because many people have strong reactions to the feel of particular fabrics.  100% cotton is usually a good choice, but sometimes tricky to find so it's worth checking before you buy!

It may also be checking what to wash it with before you commence too - lots of people react to different laundry detergent, so use the one they prefer.  These blankets are washable, but they are going to be heavy to do, and it's always a good idea to pre-wash fabric before sewing!

We pre-washed it. and once we laid it out to compare to it's recipient, we decided that half a single quilt would be adequate.  This would suit a small adult, for handy reference.

We cut the quilt in half, finished off the edging on the raw edge (turned it under twice and stitched).

We left the bottom seam intact, and reinforced it by topstitching along that edge.

Then the measuring began.  I had my favourite Tailor's Chalk pencil with me - it has 3 colours, which was very useful for keeping track of which lines to follow!

We aimed for 10cm / 4 inch square pockets for the beads to go into.

We measured the vertical channels first.  These were spaced at 10 cm apart, and were simple straight lines to sew from top to bottom of the quilt.

This left the top of the channels open for pouring in the beads.

Before we began, more measuring!  We measured the horizontal lines, spaced at 10 cm, marking at intervals across the quilt.  Ideally, it would be good to use a rotary tailors' chalk to draw the lines, or use a long ruler & chalk.  But I was happy to eyeball it using the marks to keep the lines straight.

We considered partially sewing the horizontal top of each pocket, leaving an inch for filling. But we decided this was a lot of fiddling for minimal benefit.  At this point we didn't have the beads, so we weren't sure how tricky it would be to get them into the pockets!

Calculating weights.
Once we had measured, we had 15 channels, and 10 rows, giving 150 pockets in total.
We had ordered 5 kg of beads (using estimates on the tutorial for blanket weight vs body weight).

This meant we needed to divide 5000g by 150, which gave us 33.3 g per pocket.

Once the beads arrived, we started measuring and pouring!  This became a family affair with everyone helping out.


Based on tips from the tutorial, we fashioned a long funnel out of a cardboard roll (paper towel inner) & a toilet paper roll, which we cut to fit & to have a narrower tip.

It wasn't pretty, but the cardboard worked really well for this, allowing the beads to get to the bottom of the quilt more easily.  I wasn't sure if the Poly Pollets would become static using a plastic tube.

For the first few rows, it was best to measure in the beads for every channel, and then sew from one side to the other, sealing all the channels at once.

We needed to keep shaking the beads into their pockets, by lifting the quilt - they did try to escape, but it wasn't a big problem!

Once the row was complete, we repeated, filling each pocket with 33g of beads, then sewing off at the 10 cm marks.

As we got closer to the top of the quilt, the channels became shallower.

This meant it was more effective to fill one pocket and sew at a time.  Then I reversed the machine to allow for manoeuvring the quilt to allow the beads to 'fall' into the pocket.

Sewing the pockets - the beads look like shimmering pearls!
By the end of the quilt, it had become quite heavy.  I definitely had aching arms ! I would recommend using gloves to make it easier - light weight grippy gardening gloves (quilters use this trick). It was handy to have a large work area and helpers around to help shift the weight.  We worked at the kitchen bench - the added height did seem to make it easier!

Once it was finished, I added an extra row of triple-stitching to ensure the beads were safely contained!

We were very happy with the end result.  Everyone tried it out.  It's definitely heavy, but the pockets spread out the weight which will be quite soothing. Playing with the beads through the fabric is also quite rewarding!
The finished result!

Bottom line?  Unless you like making things and a bit of problem solving, I do think it's worth the price of purchasing the completed blankets.  However, we enjoyed the process, and the children practised a lot of maths skills in the process.  It also enabled us to make a full sized blanket for a fraction of the cost.  The Ikea Quilt was $20, and the beads around $30 (check this).  An equivalent quilt would have cost at least $150.

So we thought it was a success!

Have you had experience with making similar resources?   Share your tips if you like!

Happy recipient - I think it matches those red shoes, don't you?


Friday 23 February 2018

Swifts and Yarn Winders


Kris Kringle was very kind to me this past Christmas.
My love of yarn-y things was indulged and I received some wished-for yarn-y equipment

I can't pick a favourite part of my present, because it was all awesome.

But I do love my Swift, and my Yarn Winder, and some people have been asking about them, so here goes...


As a child, I remember helping mum wind yarn into skeins to be washed, then from skeins into balls again.

It involved holding the yarn stretched between my hands for as long as it took her to wind up the ball.

Recently when I have purchased gloriously beautiful skeins of hand-dyed yarns, I've been revisiting my childhood skein-winding experiences.

However, my children get bored before I've had a chance to wind the yarn, so I have been using upside-down chairs or my knees (good excuse to sit and relax).

Those days are now over and my kids are interested in helping again!  Playing with spinny things is way more fun than just holding some wool and staying still.

In fact, my daughter is more proficient at using the Swift & Yarn Winder than I am.  I'm very grateful to her aunt for getting her into training quickly!

Here's some pictures of the Swift, the Ball Winder , and the final pretty cake of yarn.  yes, really, it's called a cake.


The Swift opens like an umbrella to the right size for the skein of Yarn.  It holds the yarn securely and spins freely to allow the winder to pull the yarn evenly onto the cake.


The winder in action - you turn the handle at the bottom to turn the spindle which the ball is on. The metal loop keeps the tension even.


Yarn is wound!


And a video of my dude winding the yarn onto the winder so you can see how it works. I generally run the winder a bit faster than that, but hey, he's only little.  And the yarn was 'sticking' a bit.


Skiing with Kids

Our favourite time of the year is when it gets chilly enough for the mountains to be coated in a glittering layer of snow.

Our best family memories have been created on our ski trips.

We have discovered that we love to be in that glorious environment, nature made magical with a covering of snow.

Skiing has given us much both individually and as a family, and so we make a point of planning to ski every year.  We are thankful that we're able to do so, although we also choose not to do other things so that we can!

Skiing is the best mental health strategy I know.
There is no option BUT to be mindful when I'm skiing.  It could be because I'm not overly talented...  I really have to concentrate - where I'm going, how I'm going to get there, are there gaps / bumps / moguls, people?  I have to pay attention.

This leaves me zero mental space for worrying about all the usual things that I worry about.  Really all I have to do is (more-or-less) know where I'm going, and how to find a way back (although seeing as I cannot read a map to save my life, I usually rely on my husband or another skiing buddy for that bit...  Returning to the same place over and over has been beneficial for me to understand how the runs and lifts connect to each other!

Oh, and what I'm going to eat.  And there is something doubly yummy about eating when you're skiing:  it's cold, you're expending tremendous energy, and all the fabulous things are just soooo good to eat when it's cold and you're hungry (none of this summer 'it's-too-hot-to-cook-or-eat' business).  Plus, there seems to be a fabulous German alpine food vibe:  Pretzels, schnapps, Glühwein, and throw in a curry for good measure and everyone is happy...  Of course, the fact that you're expending all that energy means you can eat more, right?  Oh wait...

The other benefit - we play together.  This is such a great way to be outside and actually play together. No distractions, no technology (well, apart from photos).  We're building family memories with our rituals (It is now compulsory that we sing the Sound of Music soundtrack on our drive to the snow each year).  It's giving our children a chance to learn a skill they'll keep for life.  And with a child with vision issues that will prevent his ever being great at catching a ball, we're keen to give him a sporting ability (that might even earn him some cred ;) )

Here's some tips for you if you're considering a family snow holiday.

How do we organise ourselves?
We have developed a bit of a system over the years.  A lot of this is from experience now, having done this a few times with the children.  Obviously needs have changed as the children change each year, but here is what we have learned!  You can benefit from what we have learned through bitter experience.... (without any suffering on your part.  You're welcome.)

Take Your own Food
Food up the Mountain is expensive.  Understandably so - they have to get it transported up there in difficult conditions, and staff the services that provide it.  While we always buy food up there, we take a lot with us, and have friends who manage without buying much at all.
Some suggestions:
Pack an insulated grocery bag with snacks, drinks, and some hot foods.  Here are some things we've done over the years:
* Taco meat (in Thermos) + mini bags of corn chips
* Macaroni cheese (in Thermos)
* Spring Veg Dip & cob loaf
* Shredded BBQ Chicken in wraps (these can fit in a jacket pocket too)

A thermos of hot water is also a great idea - you can easily make a hot chocolate or tea which will keep you going.

Tip:  buy a good quality Thermos (Thermos brand or similar) - they make a difference in keeping things hot!

Also, look out for "Happy Hours" - hot chocolate at the Perisher Mid Station is cheaper at certain times (before 10.30 and if the major lift is on windhold).

Take More Food:  Food in the Car
On one memorable evening driving down the mountain in bad conditions, the usual 45 min drive turned into 4+ hours.  We were lucky because we didn't slide off the road in the snow (see Safety First below).  We had desperately hungry and bored kids - again, we were thankful to be warm and dry.

Since that adventure, we always keep extra food & drinks in the car, as well as charged up iPads/entertainment.

Pack a spare fleece, trackies & uggies in the car for everyone.  That way you can get out of wet/heavy ski gear, and get warm & comfy for the way home. Learn the art of changing in the car/car park ;)  Pretty much everyone does it, and you've got thermals under everything, so it's all good :D

Pack a garbage bag / ikea bag to take all the wet gear/boots.  An old towel is also handy to protect the back of the car while getting organised.

Yep!  Yet more Food:  Pocket Snacks
One of our weird family rituals is Pocket Snacks.  We've converted friends to them too...
A ziploc bag with high energy food that fits in your pocket.  It's easy to get to something if you need a boost. The kids particularly need these, as the cold & the strenuous activity are exhausting.  Hungry kids are cranky kids.
The kinds of things we pack? Kit kats (we only eat these at the snow, must be some clever marketing going on there), nuts, dried fruit, chocolate coated biscuits, snakes lollies, protein bars, muesli bars

Warm+Dry = Happy
Cold + Wet is another way to have cranky kids. And therefore, cranky parents.
For the warmest, happiest peeps:
* thermals
* proper ski socks (cheap at aldi)
* mid layer (like a long sleeve tee, or a skivvy, but get technical fabrics that wick the moisture away - the old cotton skivvy from your childhood will just get sodden)
* fleece
* Ski pants - In our experience, the Bib & brace style is great for children, because it protects them from having snow go down their pants in their many tumbles
* Ski jacket - it's worth getting the gear, they have pockets in the right places for the right things (eg. your Lift Ticket)
* Buff/fleece cowl:  again, cheap at Aldi - great for pulling up over mouth/face/nose while on the lifts
* Balaclavas - these have been excellent in bitter conditions - again, lightweight fleece ones from Aldi have been great.  Husband & I wear some lightweight silk ones (again from Aldi), or I have a fleece one that's good for really cold days
* Helmets - Ski helmets keep kids (and you!) safe and warm.  They are compulsory for kids in lessons, and can usually be hired free with any other gear.  We wear them too, and I am certain I've been saved from some concussions by my helmet in a couple of nasty tumbles I've taken.
* goggles - again, Aldi has cheap reliable ones - you really can't manage without these

Load up those pockets!
Lip balm
tissues/hanky
lens cleaning cloth - often attached to one of the pockets of your coat
Ziplock bag to put your phone in.  Oh, and zip your phone in, every time.  I've learned this one through bitter experience.

Safety First (even though I put it last, it really should be first!)
* Ski/Board Lessons - for everyone!!  See below!
* Driving - Living in Australia, we don't often experience the hazardous conditions of driving on black ice or snow.  You need to know how to handle the car, especially if something goes wrong and you start sliding on the snow & ice.
An excellent video for identifying & handling black ice can be found here - seriously it's 1 minute to watch, and could save your life.
Other great tips can be found here and here (including planning ahead)

Random stuff
At our ski fields in NSW this is what you need:

National Parks Pass - if you drive up to the resort, you need to purchase 1 for your car.  You can book ahead online, or purchase in Jindabyne at their office.
- if you catch the Skitube or a bus up to the resort, it is included in the fare.

* Chains - if you are driving into the National Parks you must have chains, unless you have a 4WD.  There will be bays at the side of the road where you will be directed to put your chains on in difficult conditions.  Whether you hire or buy them, do a practice run before you are up there in bitter, snowy conditions.  There are also youtube how-to videos.  Chains are sized according to the wheel/tyre size, so you do need to know which car you're going to use them for.

* Lift pass If you want to ski/board down a slope, you have to get up it first.  To ride a chairlift you need a pass.  Of course, you could always trudge up the mountain but that would be tedious and tiring.  Choose the fun option and buy a pass.  The pass is worn in the sleeve of your jacket, and you scan it to enter the lift queue.  The resorts (Thredbo, Selwyn, Perisher) have a range of deals you can check out online.  Costco also sells some discounted deals that include lessons.

Lessons Everyone should do lessons! We put our kids into day programs, in which they learn to ski and are also given hot meals. It gives us a chance to have some fun together and cover more ground than we can with kids.  As the kids' skills are going to surpass ours soon, we may not put them in the full day programs as often, but we still enjoy the time together!
Adults should also have ski lessons, especially if you are a beginner or a bit rusty. There really should be a basic skills test that everyone has to pass before being allowed on a lift.  We've rescued a number of people on difficult slopes that didn't actually know how to stop or turn.
As a minimum you need to know how to:
* snowplough to slow, stop & turn,
* get on & off a lift safely. (I won't get started on the number of people who've nearly taken my eye out because they aren't following the instructions to safely carry their poles).
You should also be familiar with the Alpine Responsibility Code which you can find here  - it lists your responsibilities on the slopes, and includes things like who has right of way.

I hope this answers a few questions and gives you encouragement to give the snow a go as a family holiday.  If you're not quite certain yet, a great way to have a taster is to stay somewhere in the area with other attractions, such as a farm stay, so you can try a day on the slopes, and have fun things to do otherwise.  The whole Snowy Mountains area is just so beautiful!